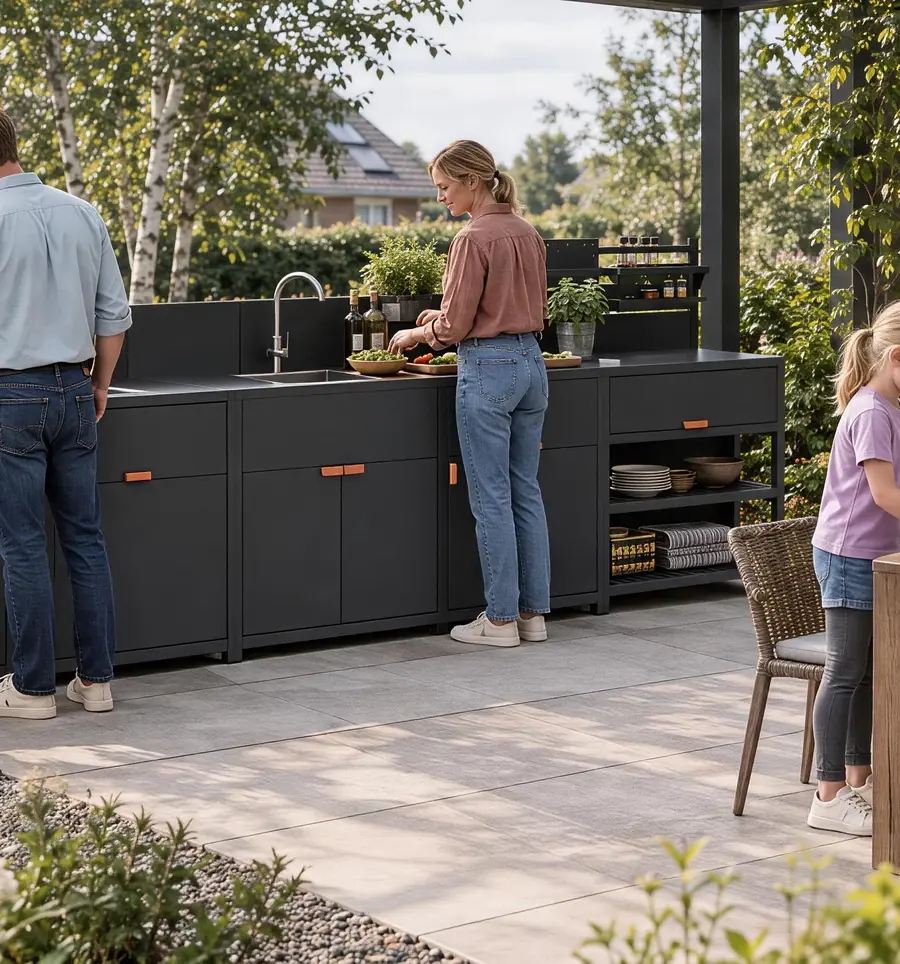
A louvered pergola maintenance plan should cover the coated surfaces, visible drainage discharge and normal roof operation after handover. Give each check an owner and a clear point for handing unusual findings to the installer or service team. A photo of a mark or a short note about roof movement is easier to act on when it includes the configuration, date and exact location. Use the current instructions for the installed pergola to decide what the site team can do.
Set the Maintenance Baseline at Handover
Identify the Installed Pergola and Its Controls
Start with the unit that facilities staff will look after. Give it an asset reference and link that reference to its location, installed model, selected roof layout, finish, and operating method. Retain the current care and operating instructions with their revision or issue date. If the terrace has several aluminum louvered pergola systems, record the model against each location. Similar structures can have different controls or instructions even when the finish and profile look alike from the dining area.
Use identifiers that make sense beside the structure and on the handover drawing. Mark roof sections, visible discharge points, and fixed landmarks such as an entrance or a column. On an illustrative restaurant terrace, P-06 serves the entrance seating and has a manual split roof. P-07 covers the west dining bay and has an electric roof control option. The handover record names the roof sections or control references for each unit. It also includes an overall photo and ground-level views that the next shift can repeat. The two assets share a terrace but have separate records.
Log the configuration at handover before recording subsequent changes. Note any site labels, control references, and observations already on the installer’s list. Link unresolved items to the handover record so later staff can see whether a mark was present at installation or first recorded during use. If the team manages several outdoor structure and living product ranges, keep the pergola’s model and file revision identifiable within the wider asset register.
Keep a dated reference photo after any approved change that affects a routine check. A revised drainage layout, a change in access, or a newly assigned control label may alter what a staff member should look for. Keep the previous view with its date and add the current one alongside it. A staff member working from a printed inspection sheet should be able to tell which version of the handover drawing it uses.
Assign Each Check and Service Contact
Agree who can make routine observations, who can perform authorized cleaning and who receives an unusual finding. At the example terrace, a facilities lead keeps the register, the site team records what it can safely see, and the designated installer or service team reviews items outside site staff’s scope. Keep a current contact in the handover file. When a task requires specialist access or service, record the responsible party and any relevant restriction on access or operation under the site procedure.
Write down the evidence that closes a check. A routine observation may need the date, location and initials. A change worth monitoring may need a photo from a defined viewpoint and a named follow-up owner. A concern about equipment condition may need a service reference while it remains open. Carry those statuses into the shift handover. They let a colleague see which checks were completed and which still need someone to act.
Ask the installer or supplier to resolve gaps in the documents before assigning a maintenance task. If the finish instructions or the control information cannot be matched to the asset, mark the item as awaiting confirmation. Give staff the instructions they can identify, a place to record observations, and the contact who can supply missing information. Also say where the current revision is kept and who updates it after approved service work.
The same schematic view shows how two control configurations change the information a service team needs.
P-06 · INTRO DUO manual split roof
L or R. Use the site’s roof-section name and identify the crank used in normal operation. Record the section’s response as seen.
P-07 · INTRO PLUS with optional electric control
M. Record the affected control zone, if assigned, the command already given and the response as seen.
The roof outlines share an illustrative scale. Symbols identify record fields. Use the site’s actual section and control labels.
Designed and created by the Outdoor Creation team.
Check Surfaces, Drainage and Roof Operation
Record Changes in the Visible Finish
Look at accessible coated surfaces from the viewpoints in the handover record. Record a visible change by component and position, such as a streak on the outside face of the west post or a scrape beside the entrance. Where practical, take one photo locating it on the structure and another showing the detail, keeping both linked to the asset. A closer view can help the installer distinguish a change in appearance from apparent damage. The photo alone may leave the cause uncertain.
Before cleaning, confirm the task is within the site team’s scope and check the approved methods and products for the installed finish. Record the date, location and method when authorized cleaning is completed. If the mark remains, retain the earlier image and share the cleaning record with the responsible team. For the scope of general cleaning and nonabrasive care, consult the FGIA guide to architecturally finished aluminum and QUALICOAT UK and Ireland guidance on coated aluminum.
Observe Drainage Discharge From Safe Access
Start with areas the site team can see safely at ground level. Note where water appeared and whether rain was still falling or had stopped. Use a fixed landmark to locate the observation precisely. A wet patch alone gives limited information about its source. Use the handover drawing to identify the documented outlet and see how the louvered pergola drainage system works for an explanation of the water path.
If confirming the location would require access beyond the agreed inspection area, record the limit and give the task to the responsible team. The facility manages access under its own procedures and applicable requirements. The planning and competence needed when work at height cannot be avoided are explained in the UK Health and Safety Executive’s guidance on cleaning work at height.
When working with an aluminum pergola manufacturer for project maintenance documentation, ask which drawings and instructions identify the installed drainage outlets and whether their locations have been confirmed in the handover record. Note which discharge points the site can observe. Make the handover drawing available to the people who will receive drainage reports.
Note Normal Movement and Control Response
Observe movement only during authorized normal use when the site procedure allows it. Useful notes identify the section, the operating method and what staff actually saw or heard. The INTRO DUO manual pergola with two louver zones illustrates why a manual record names the particular roof section and identifies its hand crank. At P-06 the staff can link an observation to the entrance side using the same names marked at handover.
 INTRO DUO Outdoor Product Scene
 INTRO DUO Split Roof Detail
 INTRO DUO Post Base Detail
The INTRO PLUS aluminum pergola with optional motorized control is offered with manual or optional electric operation. The P-07 example assumes the optional electric configuration, so its record identifies the relevant control and the command issued. If motion appears uneven, stops unexpectedly or is accompanied by an unusual sound, pause use and refer the observation under the site procedure. Record the details available from the event and leave further checks to the designated service team. That team manages the risk of unexpected startup under the instructions and requirements applicable on site. For US workplaces, this risk is covered in OSHA guidance on hazardous energy control during service.
The INTRO PLUS photos show visible reference points such as the roof and the meeting of the beam and post. The series is photographed in different configurations. Confirm the control type fitted to the actual unit in the handover documents, and use any identifiers from those documents in the operating record.
 INTRO PLUS Outdoor Product Scene
 INTRO PLUS Roof Detail
 INTRO PLUS Post and Beam Detail
Use the dates and site events agreed for the installed pergola. Apply the same area labels as the handover record.
| Area and trigger | What to observe | Record and owner |
|---|---|---|
| Coated finishAt an agreed check or when a mark is reported. | Look for new deposits, scratches or coating loss from safe access. Compare with the baseline photo of the same face. | Site teamLog the frame face, date and matching photos. Refer suspected damage to the designated contact. |
| Visible drainageAfter a rain event identified in the site plan or a water report. | From ground level, note where water is visible, where it leaves the structure and whether it collects. | Site teamRecord recent rain and the location. Send recurring or inaccessible issues to the assigned service contact. |
| Roof motionDuring normal use within your role, or when a change is reported. | Note a change in movement, sound or response. Use the observation already available if an abnormality was reported. | Authorized operatorLog the roof section, operating method and observed response. Pause use and refer suspected damage or abnormal operation. |
When access is limited: Leave the check open and record what you could see. Name the person or team responsible for reviewing the rest.
Designed and created by the Outdoor Creation team.
Record each type of check on its own line. A shift might see that the finish matches the baseline and observe drainage discharge after rain while finding no opportunity to see normal roof movement. Enter what staff actually checked, then mark the operation item as unobserved and assign any required follow-up. This keeps a partial visit useful and prevents a completed surface check from being read as a report on the whole roof.
Schedule Follow-Up by Site Conditions
Use Agreed Triggers and Keep the Same Viewpoint
Set routine dates using the instructions for the installed model and the facility’s own maintenance plan. Then agree which site events prompt a separate observation when conditions allow. A facilities lead may want an observation after changes to the layout, after adjacent work that brings dust onto the terrace or after a reported change in discharge. A check before a reopening or a busy event can help the team see what remains unresolved. Agree who receives that list before the site begins normal service again.
Name the conditions under which a comparison is meaningful. For a coated post, compare dates and take the image from a similar angle, preferably in comparable light. For a discharge observation, record whether surfaces were dry before the event if that is known, the approximate time of the rain, and when staff took the photo. For a movement observation, retain the time and operating command that staff actually used. Where the record lacks a condition, leave it unknown. This gives the reviewer both the evidence and its limits.
On the example terrace, staff notice a wet patch at the edge of P-07 after rain. The opening shift records the time and the side of the bay, and takes an image from the normal approach. There is no evidence of its source in the first photo. The facilities lead leaves the observation open and asks the next assigned shift to compare the same location at the next agreed opportunity. Separately, the lead follows the site’s procedure for keeping wet walking areas safe. The next shift can then see the state of both the floor and the maintenance record.
If the next image shows a dry surface, record that finding with its conditions. It may have been taken after a different period of rain or after the paving dried. If the same location shows a wet patch again, attach the new observation to the original entry so the reviewer can compare timing and position. Follow the site’s criteria for further assessment or referral when the issue recurs.
Decide Whether to Monitor or Refer
Use the instructions and the facility’s agreed responsibilities to decide what happens after an observation. If a routine task has been authorized and there is safe access, let the assigned person complete it and record the outcome. If an observed change can be monitored under the site plan, name the person and event or date for the next observation, with a separate field for outstanding information. Refer concerns that cannot be assessed within the approved scope. When equipment appears damaged or moves abnormally, pause use and send the record to the service team.
Before a later opening at P-07, a staff member sees the roof hesitate during normal operation and hears a new sound. The staff member follows the site procedure, leaves the unit out of use and tells the facilities lead which command had been issued. The lead reports the motion change separately from the earlier wet patch. The service record preserves both observations without assuming that they share a cause. P-06 has its own status. If the site changes access around either dining bay, staff use the site’s agreed process to communicate which area and unit are affected.
- Carry out routine care
The observed condition matches the baseline or is covered by a routine task assigned to the site team.
Action: Follow the installed model’s care instructions and log the outcome.
- Record and arrange a review
A visible change needs comparison or the observation is incomplete. The site’s criteria for pausing use have not been met.
Action: Keep the check open, record what is known and name the next reviewer.
- Pause use and refer
Damage is suspected, the roof operates abnormally or the site requires a pause.
Action: Send the available record to the designated service team. Wait for the site’s authorized return-to-use decision.
Make the referral with the evidence already available. If the roof has moved abnormally, keep it out of use without repeating the movement for a photo or video.
Designed and created by the Outdoor Creation team.
Hand Over a Useful Service Record
Capture What Happened and Where
Give the service team enough information to identify the unit and understand the incident without asking the site to reproduce it. Include asset reference, installed model, location, order or handover reference, and the applicable document revision. Describe where the change was seen, what staff were doing before it occurred and which controls or roof section were involved, if known. Record the date and time, weather where relevant, and any action already taken. Attach only pictures or recordings the site obtained safely. The report should say who can meet the service team and what remains out of service.
For P-07, the example record identifies the west dining bay and its optional electric control. It states that staff observed a hesitation and unusual sound during normal operation and that the unit was subsequently taken out of use. The facilities lead attaches the relevant handover entry and a ground-level location photo. If no close-up of the drive was taken, the handover report can still be actionable. Keep the earlier water observation as its own open entry and link it for context when the service team considers it relevant.
When contacting a pergola supplier for field service records and follow-up, check which documents or part references it needs to match the installed configuration. Information from our outdoor structure manufacturing facility can sit alongside the installer’s site documentation. Retain which party issued each record so the next reviewer can tell which details describe supplied components and which describe the completed installation.
Example café terrace, west dining bay P-07. Use a ground-level position only where access remains clear and the area is safe to enter.
A. Frame the bay from the terrace approach and link the existing location photo.
B. Use the side path if it is approved and open. Frame the visible post or affected edge of the bay.
Carry the same details into the service record
- Locate
- P-07 west dining bay, control reference and affected position. Attach an existing photo where it helps locate the area.
- Describe
- Date, weather or command as relevant, and what was seen. Keep the wet patch and roof hesitation in separate entries.
- Follow up
- Assigned contact and outstanding checks. Add the service finding, authorized return-to-use decision and date when available.
Reuse the viewpoint for a follow-up photo when access is safe. If access is restricted, log that limit for the service team.
Designed and created by the Outdoor Creation team.
Confirm Who Clears the Pergola for Reuse
Agree the return-to-use authority in the site procedure before a fault occurs. After service, keep the report with the relevant asset entry. Record what was checked, which conditions or actions still apply and who is authorized to confirm that use may resume. If the service team provides revised operating or care information, record the change and give the current version to everyone who uses the controls or maintains the asset register.
Record the return decision against the exact asset and work covered by the service report. If the report covers roof operation only, file it against that entry and keep the surface and drainage observations under their existing owners. Enter any later monitoring as a separate action with its own date and evidence. The shift lead can then use the current asset status during opening and refer colleagues to the service record when they need more detail.
In the example, the facilities lead logs the P-07 service outcome when it is available and passes the authorized reopening decision to the next shift. The written handover identifies who made the decision, when it applies, and where to find the associated report. Keep the record available to the installer and site team so that a later observation can be compared with both the original handover and the work carried out since then.
Frequently Asked Questions
How often should a louvered pergola be checked?
Use the current instructions for the installed model and the site maintenance plan. Agree which site events call for an additional observation and who records the result.
What should a dealer tell customers about routine care?
Give customers the model-specific care instructions, the checks they may perform and one service contact. Explain what information they should include when reporting a change.
Can the site team clean the coated finish?
Yes, if the task is designated for the site team and safely accessible. Use the method and products specified for the installed finish.
What should I record if water collects below?
Note when it appeared, recent rain and the exact location. Take photos from a safe position and send the observation to the responsible team if it persists.
What if the louvers move unevenly or make noise?
Pause use if movement appears abnormal. Record what occurred without cycling the roof again for evidence, and refer the case to the designated service team.
How do manual and motorized roof checklists differ?
Record the actual operating method. A manual roof record identifies its roof section and crank. A motorized roof record identifies the affected control zone and command.
Can an operator lubricate or adjust the drive?
Follow the technical instructions and the assigned service scope. Refer drive adjustment, electrical work and any uncertain lubricant requirements to the designated service team.
Who confirms return to use after a fault?
Follow the site’s agreed procedure. Record the service team’s findings, the person authorized to clear the pergola and the date that use may resume.
Discuss Your Pergola Handover Requirements
Share the pergola configuration and who will look after it after installation. We manufacture pergolas directly in our own factory and can discuss custom options, the applicable care information and which service details your project team should confirm before handover.
Materials, hardware, installation responsibilities and order terms depend on the agreed project scope and confirmed final custom specifications.